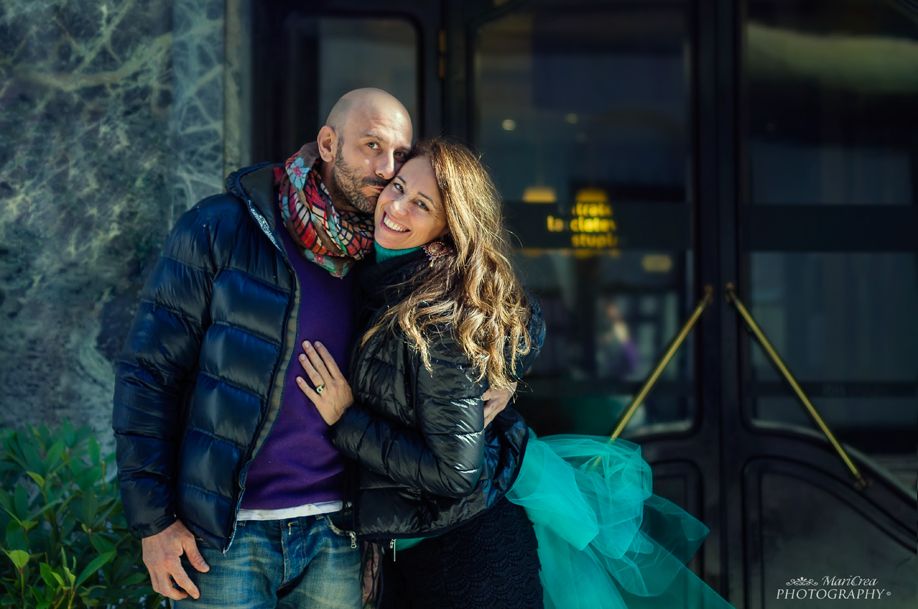
Let’s take up from where we left off last time, talking about engagement photography.
In my previous post, I discussed clothing and props, and another element that characterises this type of photographic service is the choice of location.
It could be a place that means something special to the couple, such as where they first met or had their first date, or simply somewhere that they both love.
The more romantic couples may prefer the countryside, where it’s easier to go unnoticed, and where the natural surroundings form a perfect background at any time of the year.
However, urban scenes too have a certain charm, although obviously a little more courage is required to pose for the camera in front of unwitting passers-by.
Usually, couples who want to do an engagement photo session are already fairly relaxed, and have little fear of publicly demonstrating their love, closeness and complicity.
That said, once you arrive at the chosen location, the first minutes are always a little bit embarrassing, so a brief introductory chat to get to know one another can help to break the ice.
In general, I ask them to think of the photographic service as a sort of story, a picture book that helps a couple to overcome those moments of impasse, those times of ‘what do we do now’?”.
However, after a few minutes the couple are usually having so much fun that they forget both the photographer and any ‘non-paying’ audience.
At this point, all that remains for me to do is to record their love and happiness, making just a few suggestions about positions and giving lots of encouragement.
I find that these sessions give me great satisfaction and I enjoy them so much, that I don’t tire from the weight of the equipment and from the absurd positions I sometimes have to adopt to get the right photos.
One thing that beginner photographers generally don’t think about is the background.
They are so focused on the main subject that they neglect anything that is not in the foreground.
I don’t know how many times I’ve gone home with photos ruined by street signs that appeared to grow from the head or ears of the person in the picture.
We see in three dimensions and perceive far-away and seemingly insignificant objects in their correct position. But photography has only two dimensions and, what’s more, the compression produced by focus lenses (especially long-focus) makes everything appear to be on the same plane and thus the street sign or lamp, which is really behind our subject, appears to grow from his head like a strange and preposterous hat.
These days, I try to pay a lot more attention to everything within the frame, though I still find myself ‘getting lost’ in the main scene and ‘forgetting’ the unwanted objects that are so difficult to remove perfectly in post-production.
The best time of day to take photographs using natural light is in the early hours of the morning or during the hour before sunset, when the light is warm and the sun produces longer and softer shadows.
Unfortunately, it isn’t always possible to fit all photographic sessions into the so-called ‘golden hour’. Those who are not familiar with photography are convinced that the ideal time is right in the middle of a beautiful sunny day. The smaller the light source, relative to the subject, the harsher the shadows (i.e. the greater the distinction between the brightly-lit areas and those completely in shadow). The sun is very big but, considering its distance from us, it can seem the equivalent of a point source of light. This is why, in the middle of a clear and beautiful day, the sun, ‘smaller’ and more ‘other’ in the sky, produces deep shadows and colours that are less bright.
If you want to learn more about this, you can find numerous articles and tutorials on line.
I started the shoot at 2pm, certainly not the ideal time of day, which is why I chose to place my subjects against the sun, in positions in which the light was filtered through the trees (which also created a pleasing light and shadow effect), or completely in the shade, with the help of the urban setting of Turin and its wonderful porticoes and beautiful buildings.
In order to reduce the shadows in images taken against the sun, it is a good idea to use a reflector or a fill-in flash.
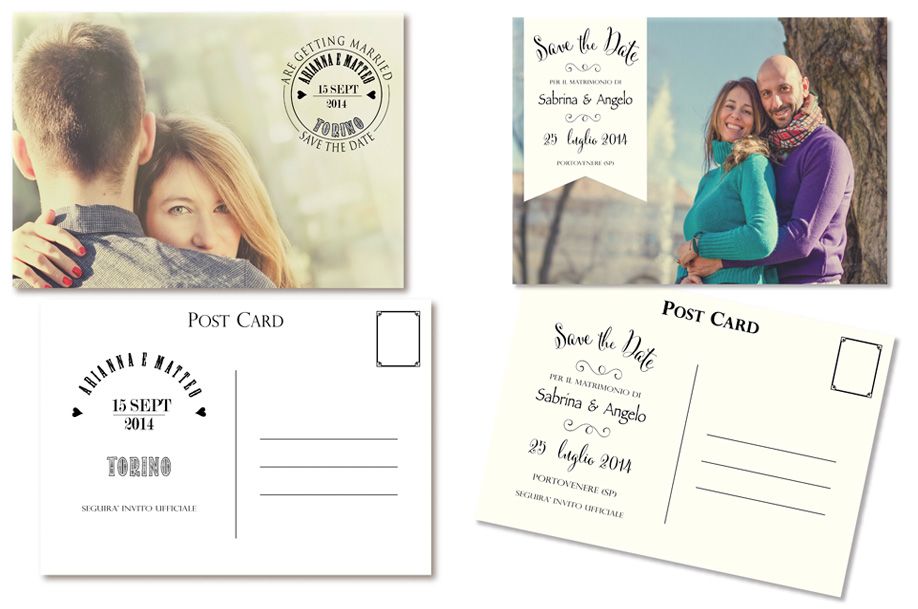
Engagement photographs can be used to create fantastic cards for the couple to send to family and friends to let them know that they will be getting married in a few months’ time.
The so-called ‘save the date’ cards.
My friend Cinzia created these lovely save-the-date cards using the photographs I took in these engagement photo sessions.
Once again, graphics and photography work hand-in-hand.
Mari
Interior designer, blogger and photographer. Expert in luxury décor and trompe l’oeil, combining her passion for photography with her love of décor and furnishings, in particular shabby chic style.
Co-creator, together with Cinzia Corbetta, of the book ‘La Magia del Bianco, lo stile shabby chic in Italia’ (The Magic of White; shabby chic in Italy), in which she was responsible for the photography.
She loves people and adores taking pictures of them in their daily lives, as well as during important occasions, such as on wedding days.


