
Silhouetting is one of the simplest, yet most effective photography techniques that you can use when taking photos with the iPhone.
The contrast between the dark subject and bright background will catch the viewer’s eye. And the mystery within the photo holds their attention for longer, allowing them to create their own stories and connections with the image.
In this tutorial you’ll discover 10 tips for creating incredible silhouette photos with your iPhone.
1. Shoot Towards The Sun
The key to creating a silhouette photo is making sure you position your subject with the light source behind them. The best time of day for creating silhouettes is when the sun is low in the sky – sunrise and sunset are perfect.

By positioning your subject with the light source behind them, you are lighting your subject from behind. The lack of light in front of them means that your camera will capture them as a dark outline against the bright background.
2. Hide The Sun Behind Your Subject
One problem with shooting into the sun is that the sun can create a very large, bright area that ruins the photo. You may also get problems with lens flare. While lens flare can add a creative element to an image, it is often undesirable.
A simple trick to get around this problem is to position the sun directly behind your main subject. This will eliminate the negative effects caused by the sun.
3. Adjust Exposure Manually
Sometimes you may find that your subject doesn’t appear dark enough and the sky is over-exposed (too bright) when shooting silhouettes. In these situations you can use the iPhone’s manual exposure control to darken the image.

Once you’ve set focus by tapping on the screen, simply swipe down to reduce the exposure. This will make the entire image darker, allowing you to expose properly for the sky and reduce the subject to a dark shape or outline.
4. Choose Subjects With Strong Shapes
The best subjects for silhouette photos are those that have a strong shape. A silhouette subject should be easily recognizable by its distinct outline against the bright background.

People make great silhouettes, but pay particular attention to their outline. Their pose and the position of their limbs can make a huge difference to how your picture turns out.
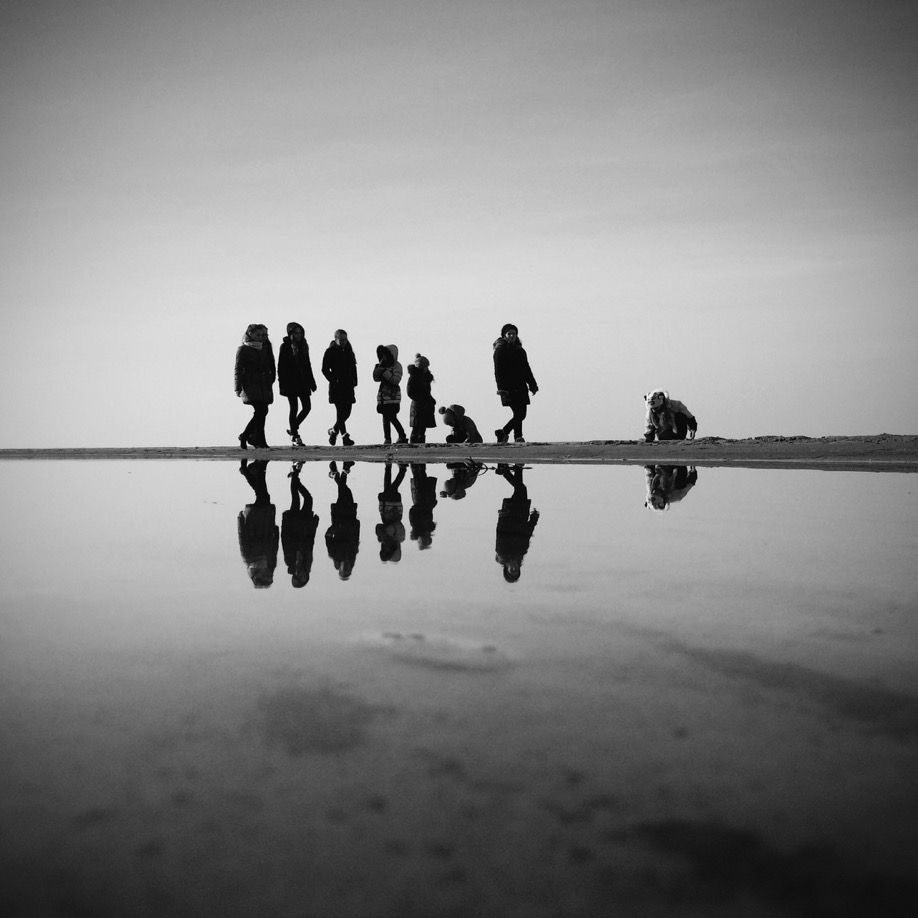
5. Be Aware Of The Background
It’s particularly important when shooting silhouettes to be aware of the background behind your subject. If the background is cluttered, the shape of your subject won’t stand out well.

A silhouette will look best when there is only sky behind them. If you’re shooting outdoors, interesting cloud formations in the sky can make a really dramatic backdrop for your silhouette.
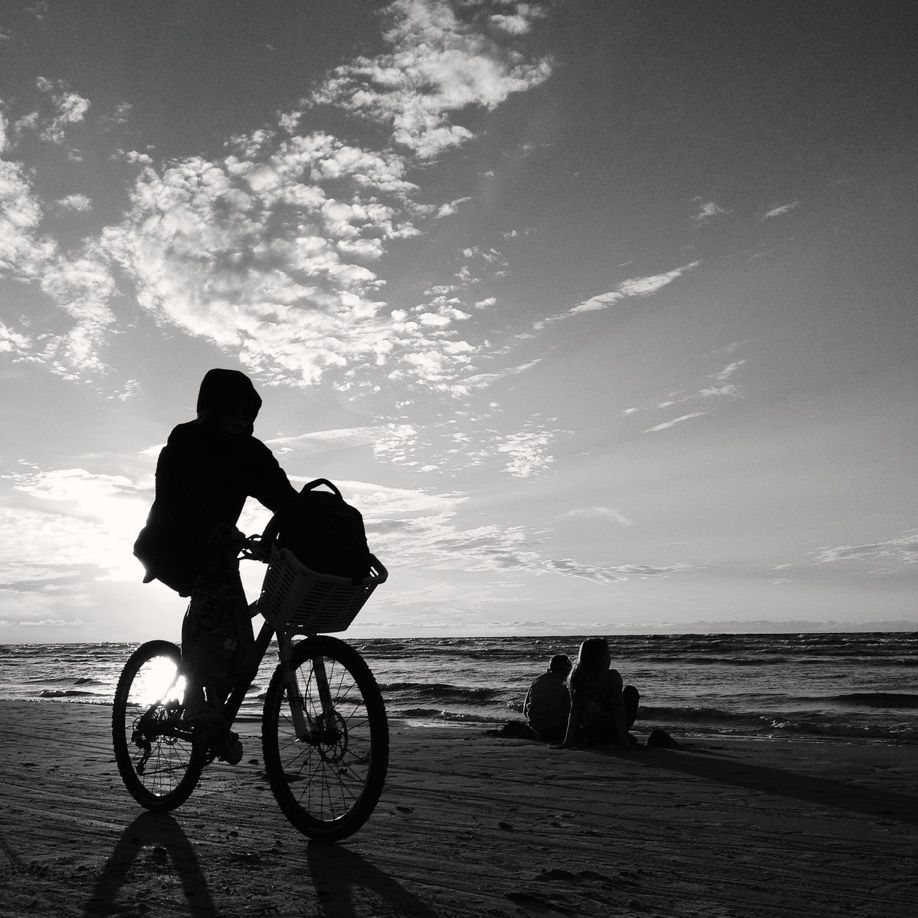
6. Shoot From A Low Angle
One of the easiest ways to achieve an uncluttered background behind your silhouette is to shoot from a low angle. Shooting from low down allows you change the position of your subject relative to the background.

The lower you shoot from, the more sky you will get behind your subject. So don’t be afraid to crouch down on your knees, or hold the camera just above the ground if necessary.
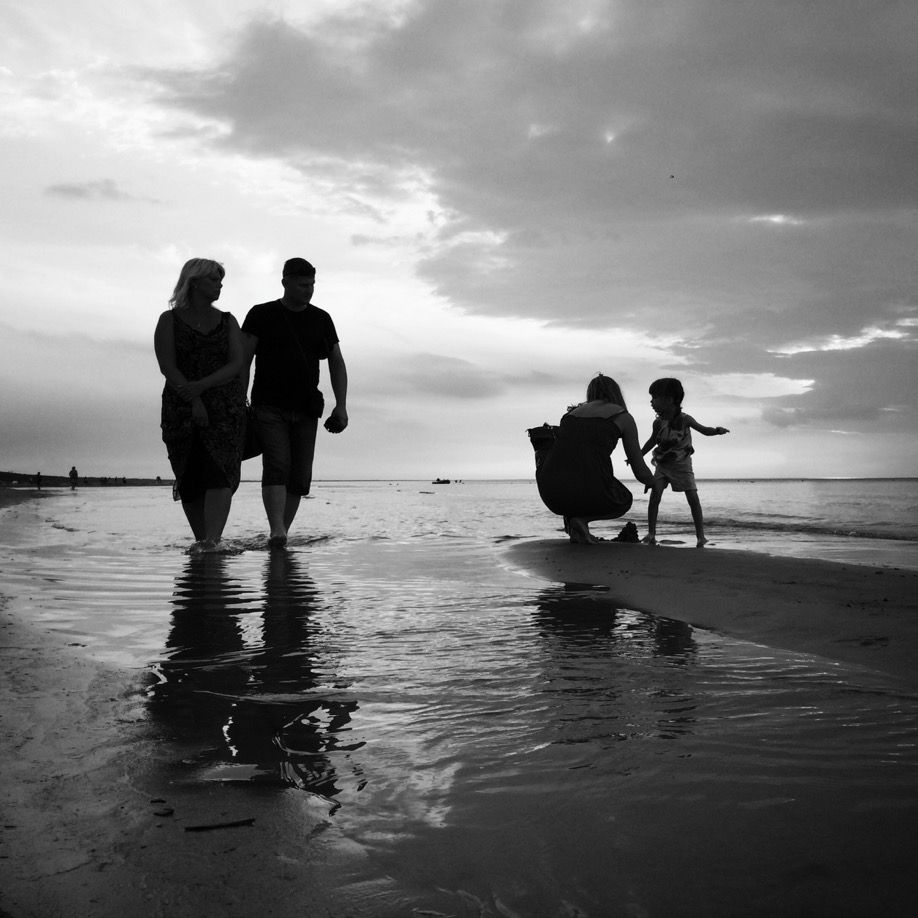
7. Give Your Subjects Space
If you’re shooting a scene that has several subjects, ensure there’s enough space between all silhouette subjects. If the subjects are too close together, you won’t be able to identify them separately.
If you’re photographing stationary subjects and they are too close together, try changing your shooting angle by taking a few steps to the left or the right.
If you’re photographing moving subjects, only photograph them when there is enough space between them.
8. Capture Movement
When shooting silhouettes, the shutter speed will typically be very fast, allowing you to capture moving subjects without any motion blur. Photographing moving subjects will make your silhouette photos more dynamic and interesting.

When shooting moving subjects, use the burst mode feature to ensure you capture the perfect moment. Simply hold down the shutter button in the iPhone Camera app, and a series of photos will be taken one after another.
9. Shoot Towards The Light When Indoors
You don’t have to be outside to create great silhouette photos. When shooting indoors, you can still use the same principle of shooting towards the light.
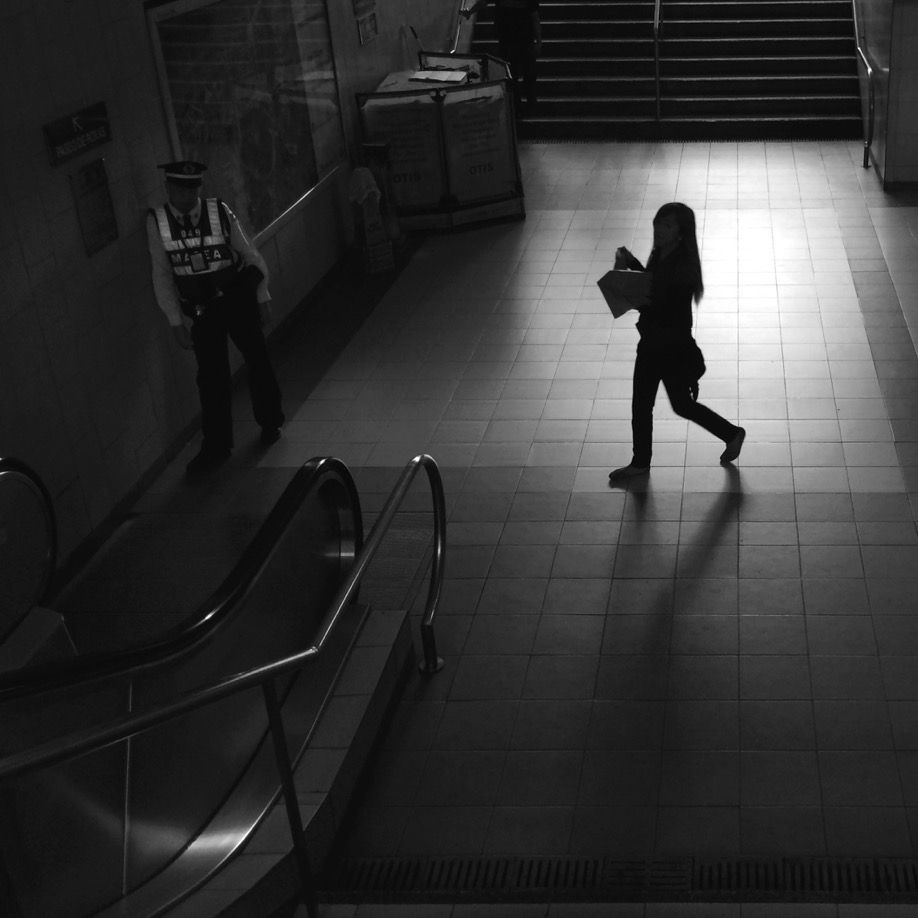
Simply position your subject in front of a window, doorway or other strong light source. The bright light will illuminate your subject from behind, throwing your subject into silhouette.
10. Emphasize Silhouettes In Post-Processing
If you edit your silhouette photos in a post-processing app, use adjustments that emphasize the silhouette effect. This usually involves increasing contrast, which makes the shadows darker and the highlights brighter.

Don’t use filters or effects that brighten the shadows or darken the highlights as this will work against the silhouette effect.
Emil Pakarklis
Emil Pakarklis is the founder of iPhonePhotographySchool.com, a website about taking better photos with iPhone. If you want to improve your iPhone photos, visit iPhoneography 101, which is a resource Emil created for everyone who wants to start taking better photos with iPhone.